
Want to get your songs sold on iTunes or Spotify? The process of getting music distributed is simple – but there are a few steps you’ll need to follow. Music distribution can help you reach new audiences, increase the chances of your songs being discovered, and increase sales. In this article we’ll take you through the entire process of finding and selecting a good distribution service provider (DSP) so that you can get your music out into the world!
Step 1: Finding music distribution companies.
To find a music distribution company, you’ll need to do some research. The first step is to search for “music distribution” on Google and see what comes up. You should look at the top results and check out their websites, customer service reviews and pricing.
Next, you want to make sure that the company has experience distributing music in your genre–you don’t want them sending your album out as pop when it’s actually rock!
Step 2: Evaluate the music distribution companies’ track record and reputation.
You should also look at the company’s social media presence and reviews. If a music distribution company has only one review on Google, that’s not a good sign. If they have hundreds of reviews on Facebook and other sites, then that’s more likely to be an indication of how well they treat their artists.
You’ll want to look at pricing as well: how much do they charge per month? Is there any sort of contract involved? Are there additional fees for things like marketing or promotion? There are so many different variables when it comes to pricing, so make sure you know exactly what you’re getting into before signing anything!
Finally–and maybe most importantly–you should evaluate customer service: how quickly do they respond to emails or phone calls from customers? Do they seem knowledgeable about the industry (especially if it isn’t your first time working with them)? Are there any recurring issues with certain artists’ accounts being closed suddenly without warning or explanation from management…
Step 3: Choose the best music distribution company for your needs.
Choosing the right music distribution company is a critical step in your quest to get your music heard. There are many options out there, but it’s important that you choose one that has a good reputation and provides excellent customer service. Here are some other criteria to consider when selecting a distributor:
- The company should have experience in the industry as well as access to key outlets for promoting artists’ work (such as radio stations).
- You should be able to easily navigate its website or app interface, which should also contain relevant information about how much it costs and what services come included with each plan tier–for example, unlimited downloads versus capped downloads per month; free songwriting tools; etcetera! This way you won’t find yourself paying extra fees later on down the road because some feature wasn’t included when first signed up with them.”
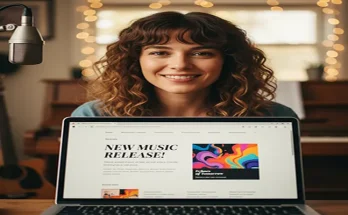
Step 4: Set up your artist page, album and song listings.
- Set up your artist page. You’ll need to create a new artist page on Bandcamp, SoundCloud or another platform.
- Add metadata for each song and album you upload. This will make them more searchable by fans and other people who want to find out about you. For example, include the titles of all songs in the description field (for example: “Track 1 – “My Love””) so people can easily tell which track they want to listen to when they go looking through your catalogue on Spotify or Apple Music etc., rather than having to play random songs until they find one that sounds familiar! Also include information about where it was recorded (if applicable), who produced it etc., if possible; anything that might help someone find out more about what kind of music genre(s) are represented by these recordings would be good too! If possible also try adding some artwork related somehow…
Step 5: Add metadata to make your songs more searchable, including album art, song names and artists.
Metadata is the information that describes your songs and makes them searchable. This includes things like the song name, artist name and album title (if you have one). In addition to helping people find your music on streaming services like Spotify, it also helps them organize their own collections of songs in order for them to easily access what they want.
There are two types of metadata: embedded and external. Embedded metadata is stored within a song file itself; external refers to information stored outside of the file but not attached directly onto its content (iTunes has its own database that contains all this data).
Step 6a (if you want to market your songs on iTunes) Selecting an appropriate category for your music genre.
Choosing a category for your music genre is one of the most important steps in distributing your music. You want to choose a category that best represents your songs and also one that is most relevant to the audience you are targeting.
In many cases, this means choosing a category that is specific enough so it accurately describes what kind of music you’re making but broad enough so it doesn’t pigeonhole you into only selling one type of song (e.g., all punk rock). For example, if I were trying to sell my acoustic pop-rock songs on iTunes and Spotify, then “Acoustic Rock” would be an appropriate choice because it covers all those genres while still being general enough not too limit me from selling other types of songs later down the road (like folk or acoustic ballads).
Step 6b (if you want to market your songs on iTunes) Confirming that the song titles don’t include potentially offensive words or phrases such as “butt” or “boobies.”
- Ensure that your song titles are not offensive.
- Check that your song titles are not obscene or vulgar.
- Make sure that the length of each title is reasonable; songs with titles that are too short may not get approved by Apple Music, and songs with titles that are too long will be truncated to fit in their window on the iTunes Store page.
- Do some research on other artists’ albums so you can avoid creating similar-sounding names for yours!
In the end, it’s up to you to decide which music distribution company is right for your needs. Take the time to research each one and make sure they have a track record of success before signing up with them. If you follow these steps, then by now I hope that you’re feeling more confident about getting started with distributing your music online!